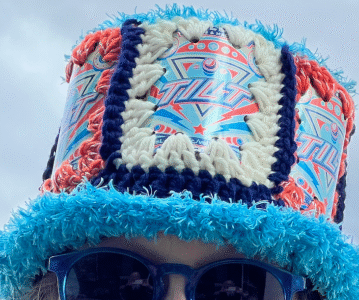
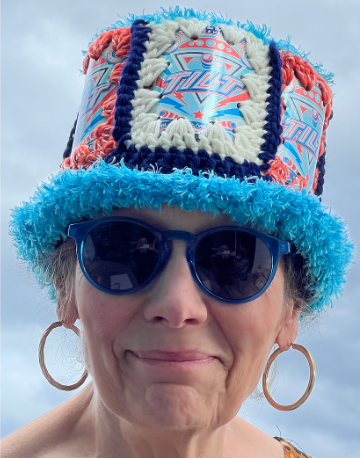
This patterns is a good starting point but there’s LOTS of room for improvisation to accommodate your materials, and the size and style of the hat.
Note: I’m walking you through how to create a 6 panel hat that is approximately medium size
7 1/4 – 7 1/2 OR 22 1/2inches to 22 3/4 inches OR 58-59cm.
This is approximate because of yarn size, crocheting technique – meaning if you crochet loose or tight stitches.
SKILLS
You’ll need basic crocheting skills: slip stitch, single crochet (sc), half double crochet (hdc), double crochet (dc)
There are oodles of tutorials online to learn the basics so I won’t do that here.
MATERIALS
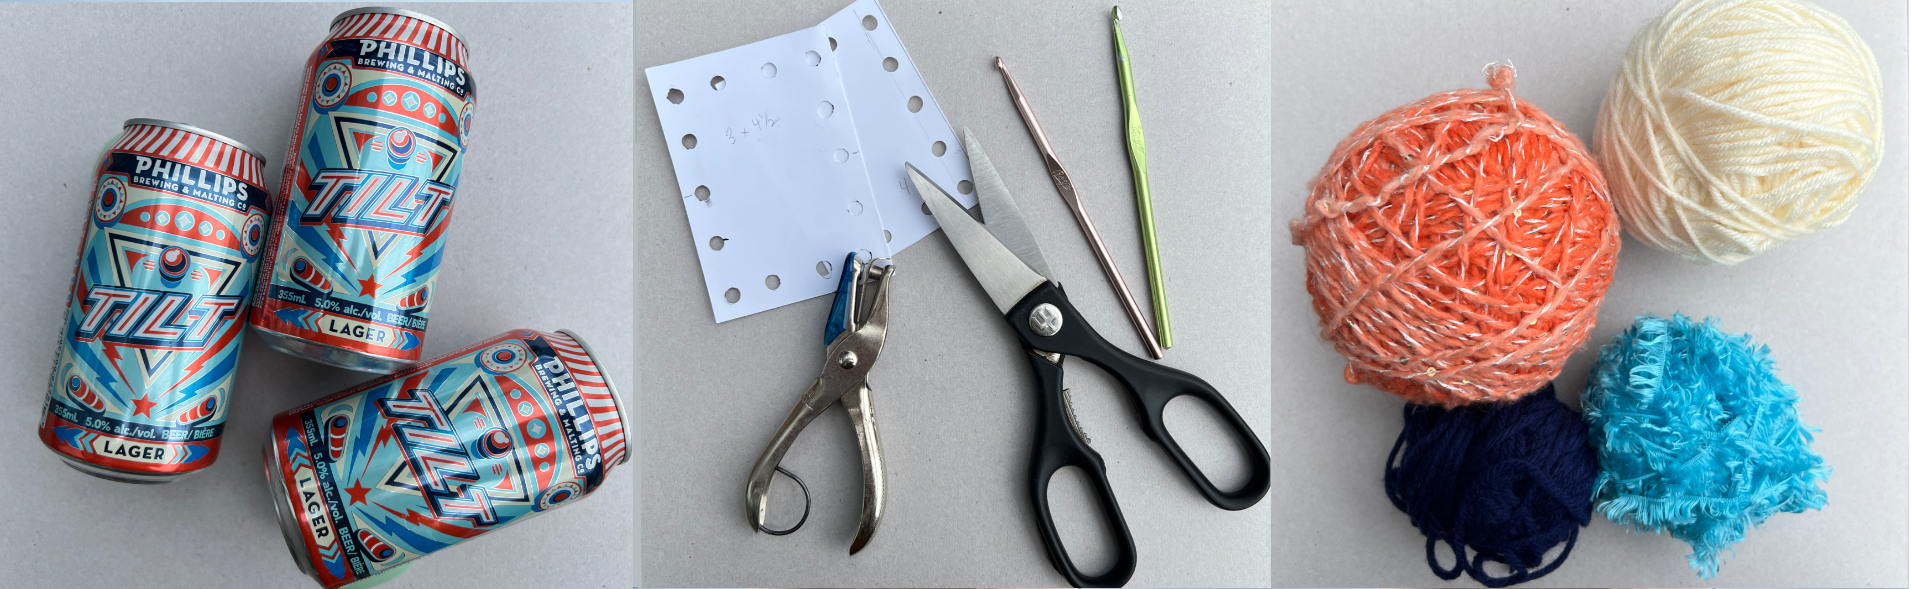
- 3-6 beer or soda cans
- 3-4 ounces (120 grams) of yarn
- Crochet Hook – H or I for worsted, G for sport yarn
- Scissors – sturdy ones you don’t mind getting dull
- Hole Punch
- Templates
- Stitch Markers or Safety Pins – helps with stitch counting
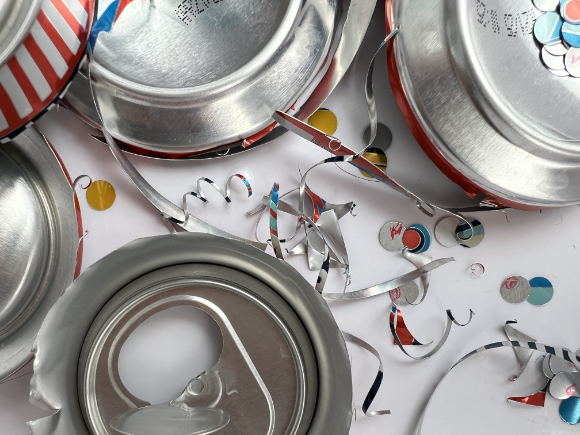
- Bag or Box for “Nasty Bits” – trimming of the cans renders bits and pieces of aluminum that are sharp
____________________________________
PREP the PANELS
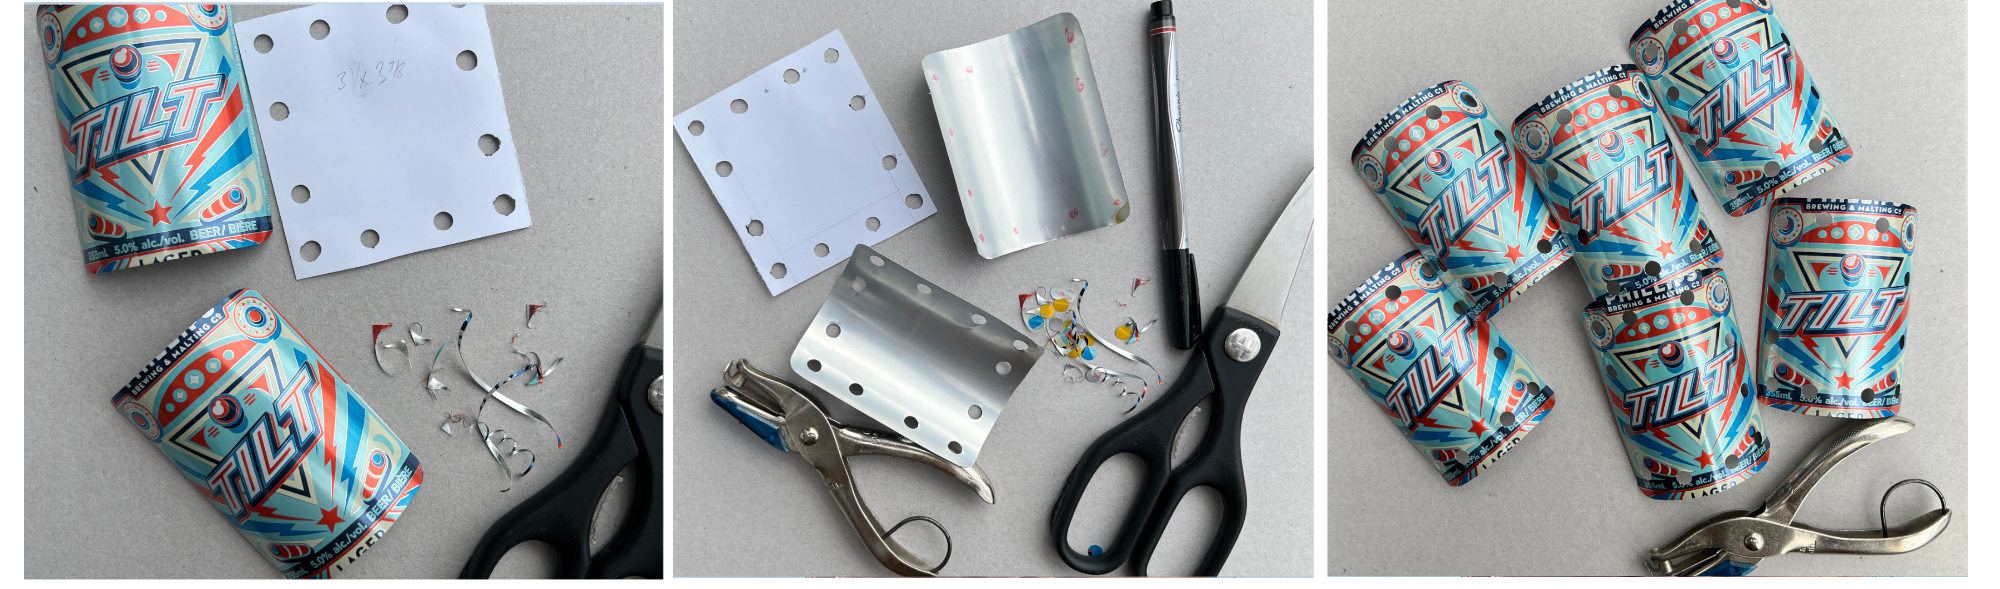
- Cut 6 panels. Choose the best graphic placement. You can eyeball the cuts, or if you’re like me and not that crafty, create a template and use that to line up your cuts.
- The first thrust into the can has to be quick jab. Jab into a place on the can that won’t dent the image you want to use.
- Round the corners
- Punch holes. I like 4 across top and bottom and, depending on the height, four or 5 on the sides.
____________________________________
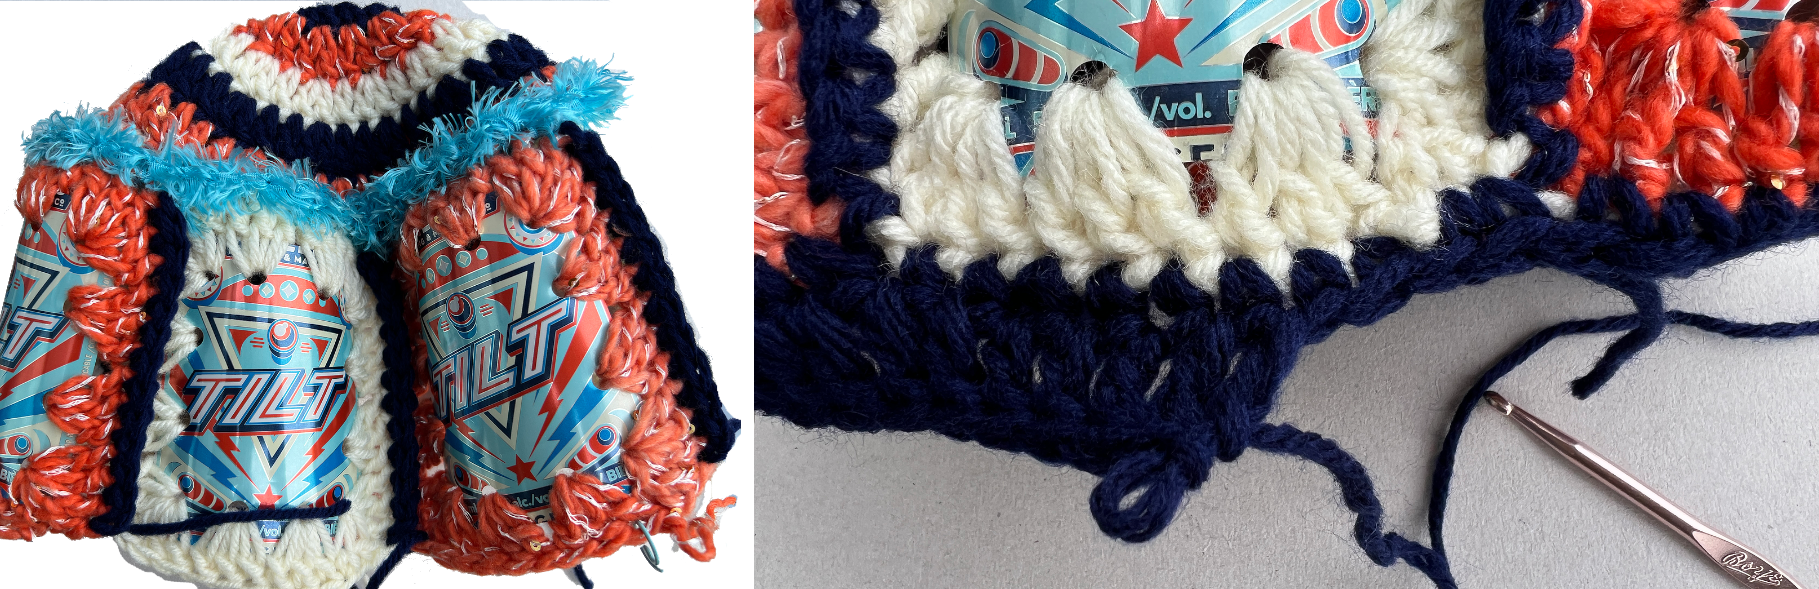
BORDER the PANELS
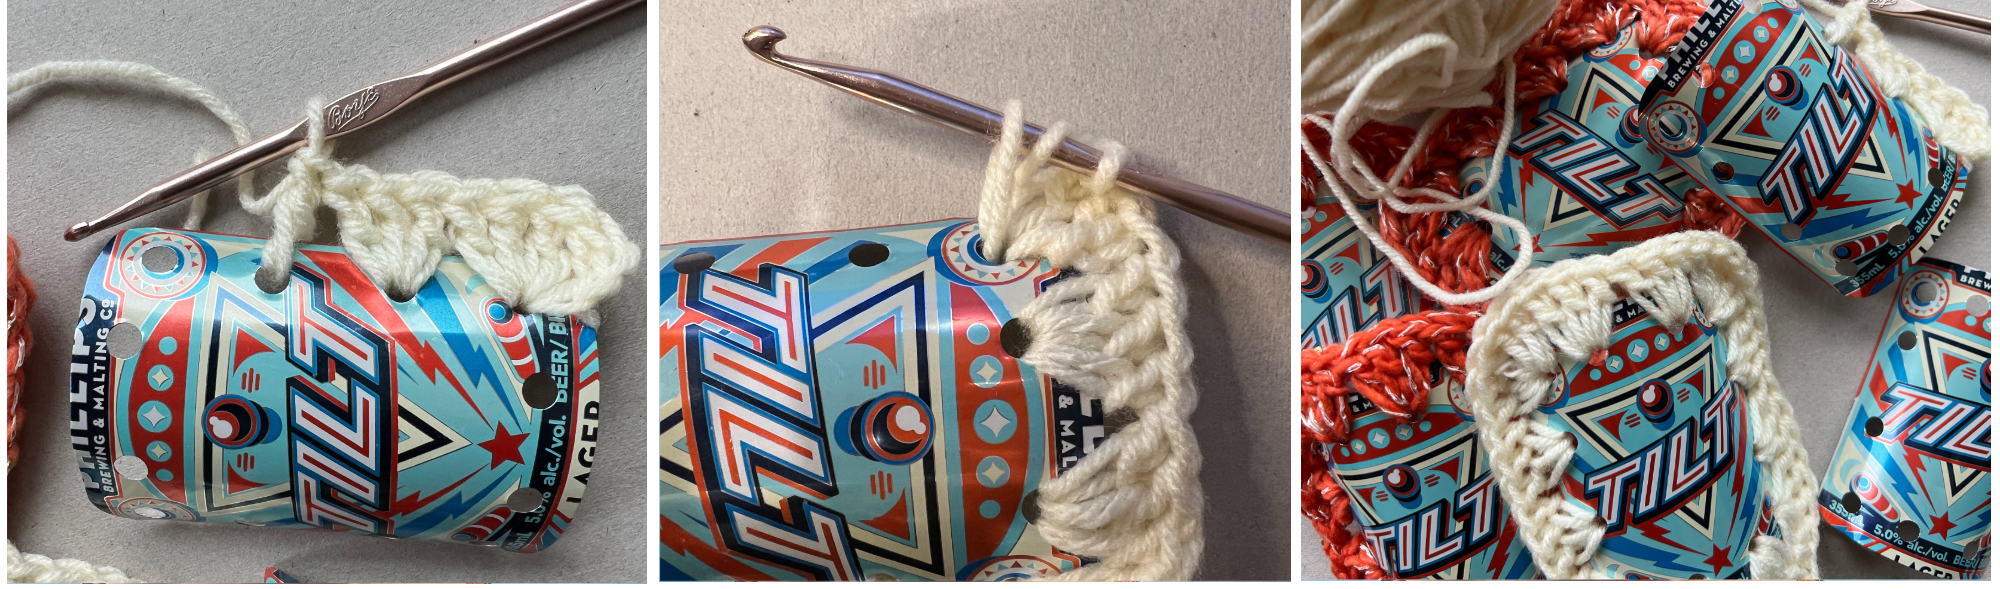
- On each panel, crochet 5 DC crochets in corner, 3 DC in side and top holes.
You can weave ends in as you go to save time later.
JOIN the PANELS


- Face panels backside to back side making sure you’ve got them right side up.
- Starting from the middle corner stitch SC the sides together ending at the middle corner stitch on the other end.
Do these for all panels. You now have a circle of panels. - Count the number of stitches around and design your top to match. Should be either 60 or 72 with a six panel hat.
CROCHET the TOP
Simple Top
- Make a magic circle and fill with 12 DC
- Round Two: 2 SC in each = 24 total
- Round Three: 1 DC, then 2DC in next stitch (an increase), repeat around = 36 total
- Round Four: 2 SC, then 2 SC in next stitch (an increase), repeat around = 48 total
- Round Five: 3 DC, then 2 DC in next stitch (an increase), repeat around = 60 total
- Round Six: SC around = 60 total
OR for a larger top: 4 SC, then 2 SC in next stitch, repeat = 72 total
____________________________________
Spiral Variation Top
Let’s get fancy and make a spiral top. This is an excellent tutorial for spirals
THREE COLOR SPIRAL
ROW 1
magic circle
1st color chain 1 1sc, 1hdc, 2 dc
Draw up a loop or insert stitch marker in this last stitch to keep track of it. Do this for every color change.
2nd color chain 1 1sc, 1hdc, 2 dc
3rd color chain 1 1sc, 1hdc, 2 dc.
12 stitches
ROW 2
1st color 2 dc in each of next 4
2nd color 2 dc in each of next 4
3rd color 2 dc in each of next 4 24 stitches
ROW 3
1st color 1 DC, 1 increase (2 dc in same stitch)
2nd color 1 DC, 1 increase (2 dc in same stitch)
3rd color 1 DC, 1 increase (2 dc in same stitch) 36 stitches
ROW 4
1st color 2 DC, 1 increase (2 dc in same stitch)
2nd color 2 DC, 1 increase (2 dc in same stitch)
3rd color 2 DC, 1 increase (2 dc in same stitch) 48 stitches
ROW 5
1st color 3 DC, 1 increase (2 dc in same stitch)
2nd color 3 DC, 1 increase (2 dc in same stitch)
3rd color 3 DC, 1 increase (2 dc in same stitch) 60 stitches
Close each color with 3 HDC, 3 SC and a slip stitch
____________________________________
JOIN the TOP to the CROWN
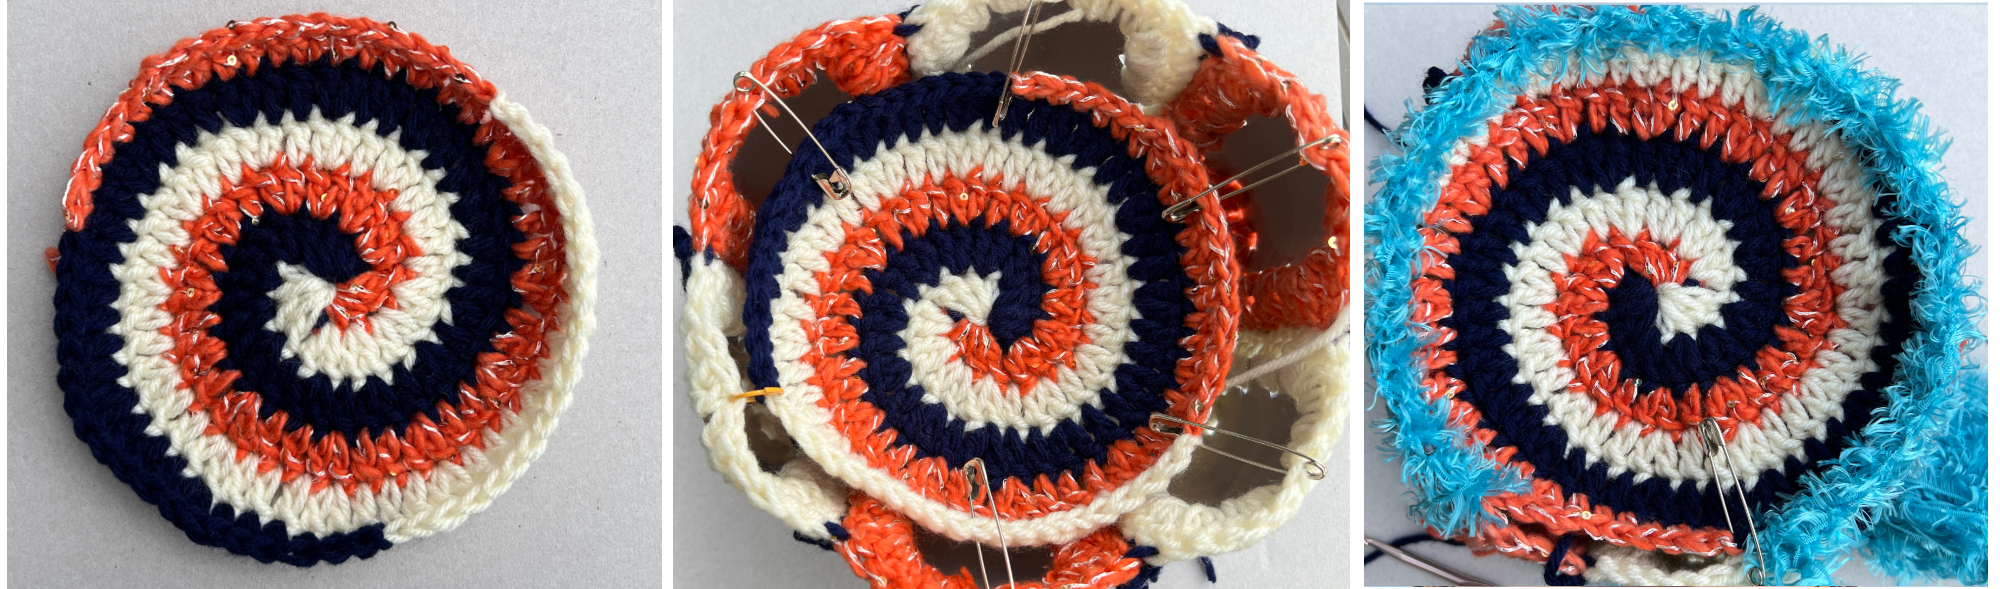
Attach the brim to the circle of panels with SC, weaving in ends as you go.
To insure a good fit, count the top of crown stitches and match that to the number in the Top
This is where those stitch markers come in handy. Slip stitch or sc single crochet the top to the crown
____________________________________
CROCHET the BRIM
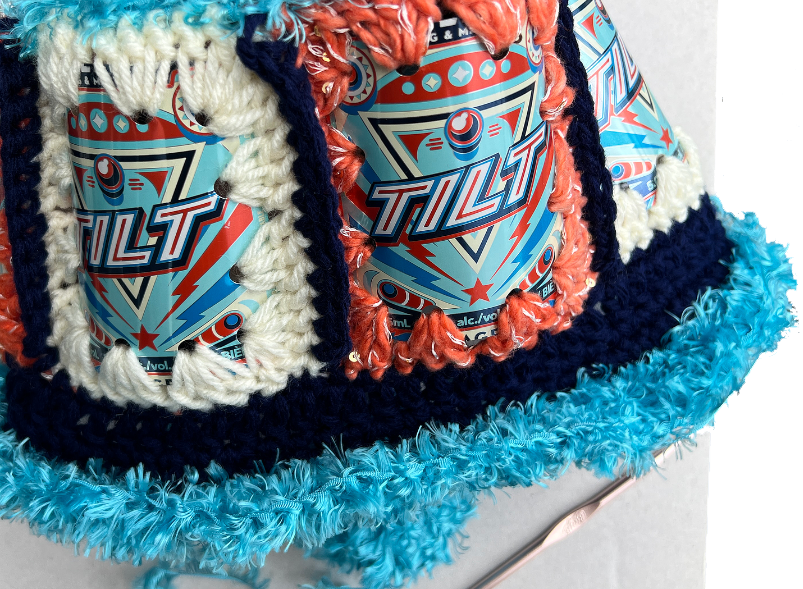 Row One: sc all around
Row Two: Every 5 is an increase / 6 hdc, then an increase (2 hdc in the same stitch) 6 hdc, then an increase repeat all around
Row Three: scattered increases , sc
Row Four: add another color or novelty yarn, sc in each
Row Five: sc all around with scattered increases
Row Six: sc all around fewer scattered increases
____________________________________
TIE IN LOOSE ENDS
And you’re done!
____________________________________
TIPS & TRICKS
DESIGN: All of this is mutable. Your hat could be made with tall or short can panels, regular worsted or novelty yarns, wide or stingy brims or no brim at all. I have seen, 4 & 5 panel hats, cowboy hat brims, fez style, a crown with filigree trim, double panel layers for tall mad hatter type creations.
Make one and take notes of what you did so you can modify as needed.
I will sometimes finish off the brim with a “crab stitch” which is just a row of sc but in the opposite direction that you have been going. Start with a chain 1 and start adding single crochets in the opposite direction.
____________________________________
CHOOSING CANS: Some cans will give you two usable images so you’ll only need three cans. Others, you’ll only get one image per can.
There is now a plethora of fun designs from microbreweries as well as the classics from the mega breweries.
You can mix and match. It doesn’t have to be all the same.
____________________________________
SCISSORS: use sturdy ones you don’t mind getting dull. I use an old pair of kitchen scissors.
____________________________________
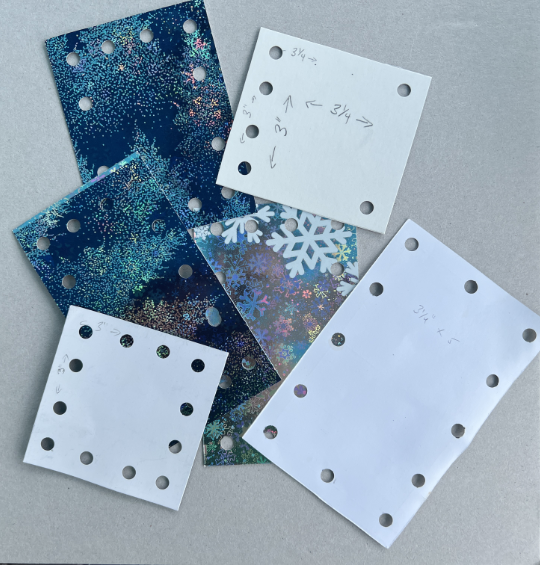
TEMPLATES: I created card stock templates.
Tissue boxes cut apart work great. And, you can have a fun pattern on one side.
Some people can eyeball this part of the process but not me. I’m not that crafty.
3 inches square (7.62cm) is a good starting point. I made an assortment and can hold them up to a can and decide how I want to cut it which is handy.
____________________________________
BARGAIN YARN: In keeping with the theme of frugal fun and up-cycling — look for yarn at thrift or 2nd hand store.
I have scored some fab colors and textures for next to nothing.
Wash the yarn to get rid of any store or perfume smells. For real wool, hand wash and air dry. For acrylic, use mesh laundry bags with just one ball or skein per bag. Trust me on this!
You will still have to do some detangling. You def don’t want to be detangling a bag of multiple skeins.
Machine wash gentle and dry on low.
Rewind the washed yarn so that any damp yarn inside is on the outside to air dry.
You can use bulky yarns for the brim which can make it sturdy but not for edging the panels due to the size of the punched holes.
You won’t be able to get your hook needed into the holes.
____________________________________
NASTY BITS: ¡¡¡ Paper Bag or other container for aluminum scraps to recycle later !!!
You will be making lots of nasty bits that could get into carpets, rugs, pet paws, so make sure they are contained.